Devices
From the Devices page, you can add devices and configure individual devices. This page also provides a detailed overview of all currently registered devices with additional information including status, clients, and general settings.
Filtering Device Information
- Navigate to Configure > Access Point > Devices.
- Select a time frame from the drop-down menu.
- Click the filter selection in the top-right.
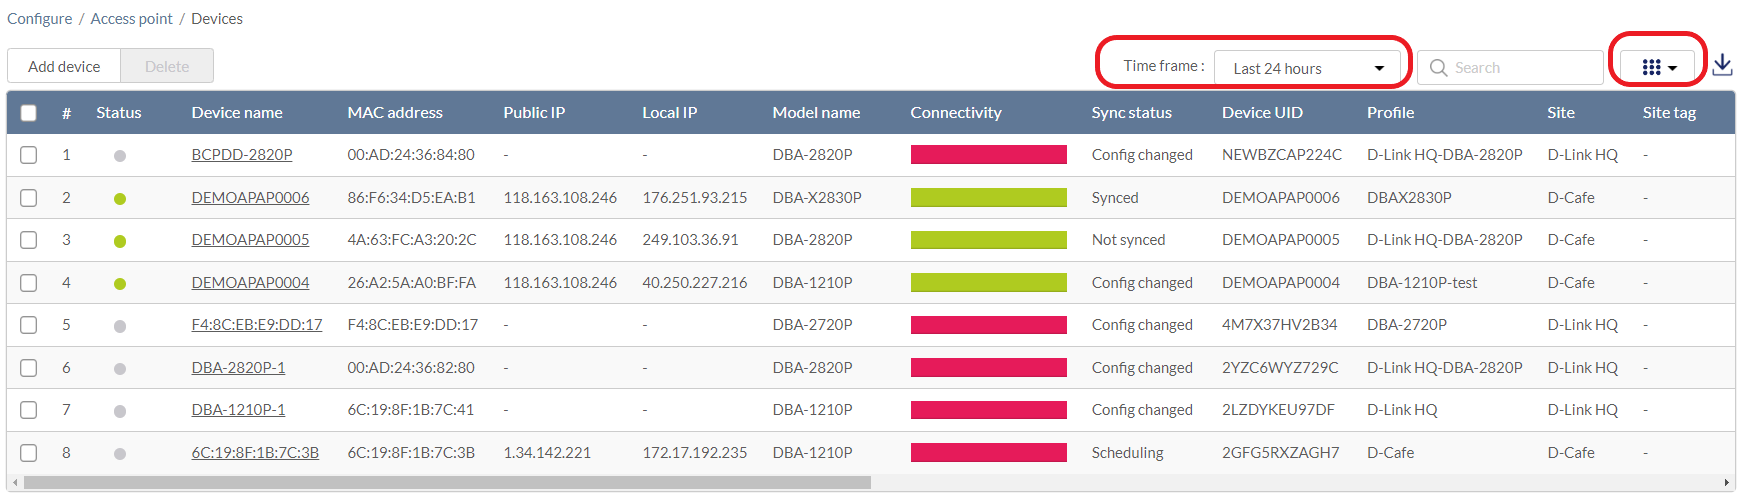
- Check the information parameters to display the corresponding device information in the overview window. Check All to show all device information parameters.
Adding and Registering Devices
- Navigate to Configure > Access Point > Devices.
- Click Add device.
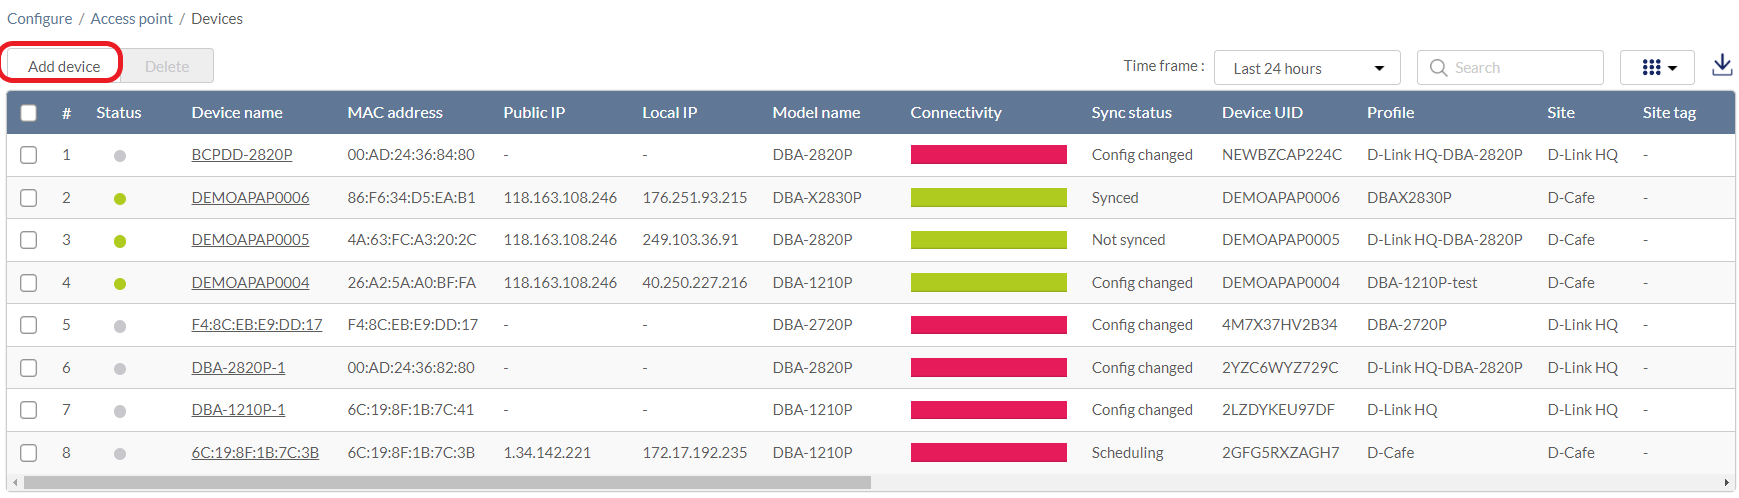
- Fill out the required information.
|
Device UID |
Enter the device’s UID is found on the label printed on the device. The UID may be listed in the format XXXX-XXXX-XXXX or XXXXXXXXXXXX. When entering the UID, do not include dashes. |
|
Device name |
Enter a name for the device. |
|
Site |
Select a Site to link this device to. |
|
Profile |
Select a Profile for this device. The device will use the settings configured in that profile. |
|
License Key |
[Optional] Enter the device license key. Note: Every new device will be issued a one year free license key. Once expired, an additional license must be purchased to continue using the device. |
- Click Save.
Editing a Device
Editing the Device Name
- Navigate to Configure > Access Point > Devices.
- From the device list, click the device name link. The Device Information page appears.
- Click the device name in the Device Name field.
- Enter a new name and press Enter or click outside of the field.
- Click Apply.
Changing the Device Site and Profile
- Navigate to Configure > Access Point > Devices.
- From the device list, click the device name link.
- In the Site and Profile section, select a Site from the drop-down menu.
- In the Site and Profile section, select a Profile from the drop-down menu.
- Click Apply.
Changing the Device Connection Type to DHCP
Depending on configuration of the network, the device may require DHCP configuration in order to connect to the Nuclias Cloud.
Note: By default, the connection type is set to Local Setting, which refers to the local connection type configured on the physical device. All unmodified devices are configured to use DHCP.
- Navigate to Configure > Access Point > Devices.
- From the device list, click the device name link.
- In the IP Connection section, select DHCP as the Type.
Note: Changing the connection type may disrupt the connection to the Nuclias Cloud. - When prompted to confirm, click Yes.
- Specify the following information:
|
[Optional] Check to enable VLAN functionality. This segments traffic on the SSID. |
|
|
VLAN mode |
Select the VLAN type. Tagged: Adds an 802.1Q header to traffic. Untagged: Does not add a tag to traffic. |
|
VLAN tag |
If the VLAN mode is set to Tagged, specify a VLAN tag. This will segment traffic with the respective VLAN tag. |
- Click Apply.
Changing the Device Connection to Static IP
Depending on configuration of the network, the device may require a static IP configuration in order to connect to the Nuclias Cloud.
Note: By default, the connection type is set to Local Setting, which refers to the local connection type configured on the physical device. All unmodified devices are configured to use DHCP.
- Navigate to Configure > Access Point > Devices.
- From the device list, click the device name link.
- In the IP Connection section, select Static IP as the Type.
Note: Changing the connection type may disrupt the connection to the Nuclias Cloud. - When prompted to confirm, click Yes.
- Specify the following information:
|
Local IP |
Enter a valid IP address. |
|
Subnet Mask |
Enter a subnet mask. |
|
VLAN |
[Optional] Check to enable VLAN functionality. This segments traffic on the SSID. |
|
VLAN mode |
Select the VLAN type. Tagged: Adds an 802.1Q header to traffic. Untagged: Does not add a tag to traffic. |
|
VLAN tag |
If the VLAN mode is set to Tagged, specify a VLAN tag. This will segment traffic with the respective VLAN tag. |
|
Enter a default gateway address. |
|
|
DNS server #1 |
Enter a DNS server address. |
| DNS server #2, #3 | Enter the optional DNS server addresses. |
- Click Apply.
Configuring the Local Device SSID Settings
Under normal circumstances, devices will use the SSID configuration settings of the Profile it is assigned to. If necessary, you can configure individual devices using local settings which override the Profile settings. This may be useful in instances where a device requires customized settings to accommodate a specific use.
- Navigate to Configure > Access Point > Devices.
- From the device list, click the device name link.
- Click the SSID tab.
- In the Use profile configuration field, select disable.
Note: Local settings are configured identically to Profile settings. Refer to Profiles for more information on how to configure each section.
Configuring the Local Device Radio Settings
Under normal circumstances, devices will use the radio configuration settings of the Profile it is assigned to. If necessary, you can configure individual devices using local settings which override the Profile settings. This may be useful in instances where a device requires customized settings to accommodate a specific use.
- Navigate to Configure > Access Point > Devices.
- From the device list, click the device name link.
- Click the Radio tab.
- In the Use profile configuration field, select disable.
Note: Local settings are configured identically to Profile settings. Refer to the Profiles for more information on how to configure each section.
Performing a Device Ping Test
A ping test is used to test the connection of the device to a target IP address.
- Navigate to Configure > Access Point > Devices.
- From the device list, click the device name link.
- Click the Tools tab in the top-right of the screen.
- In the IP address/FQDA field in the Ping section, enter a valid IP address or FQDA.
- Click Ping.
Performing a Device Traceroute Test
A traceroute test can be used to analyze the amount of hops a data packet requires to reach its destination. This may be useful to diagnose slow data transmissions.
- Navigate to Configure > Access Point > Devices.
- From the device list, click the device name link.
- Click the Tools tab in the top-right of the screen.
- In the IP address/FQDA field in the Traceroute section, enter a valid IP address or FQDA.
- Click Traceroute.
Performing a Blink LED Test
A blink LED diagnostics test is used to verify the indicator LEDs on the tested device are working correctly.
- Navigate to Configure > Access Point > Devices.
- From the device list, click the device name link.
- Click the Tools tab in the top-right of the screen.
- In the Others section, click Start to start the test.
Note: The Start button will change to Stop once the test begins. - Click Stop to stop the test.
Manually Rebooting a Device
- Navigate to Configure > Access Point > Devices.
- From the device list, click the device name link.
- Click the Tools tab in the top-right of the screen.
- In the Others section, click Reboot.
Adding a License Key to a Device
- Navigate to Configure > Access Point > Devices.
- From the device list, click the device name link.
- Click the License tab in the top-right of the screen.
- In the License Table section, click Add License.
- Enter a valid license key.
- Click Save.
Deleting a License Key From a Device
- Navigate to Configure > Access Point > Devices.
- From the device list, click the device name link.
- Click the License tab in the top-right of the screen.
- In the License Table section, from the license key list, click Delete under the Actions column of the license key you wish to delete.
- When prompted to confirm, click Yes.
- Note: Deleting a license key from a device will reclassify it as Unused in the license management inventory until it is reassigned to another device.
Deleting Devices
Assigned devices can be unassigned and remain in the device inventory so they can be reassigned at a later point.
- Navigate to Configure > Access Point > Devices.
- From the device list, click the checkbox next to the device you wish to delete.
- Click Delete.
- You will be asked whether you would like to delete the device permanently or move it to the inventory.
Downloading the Device List
The device list can be exported in a CSV-formatted file and download to the local device.
- Navigate to Configure > Access Point > Devices.
- From the device list, click the Download icon in the top-right.
