Advanced Settings
The Advanced Settings provide configuration menus for Security Assertion Markup Language (SAML), SMS and Syslog Server.
Note: The Advanced Settings page is only available to users with the editor role and above.
SAML Configuration
Security Assertion Markup Language (SAML) is an XML standard used for the exchange of user authentication data. With SAML authentication, single sign-on (SSO) experience can be achieved across application service domains between an identity provider (IdP) and Nuclias Cloud.
Before you can set up SSO via SAML, please obtain identity provider (IdP) information by visiting their help centers, for example, Set up your own custom SAML application from Google.
To enable SAML on the system:
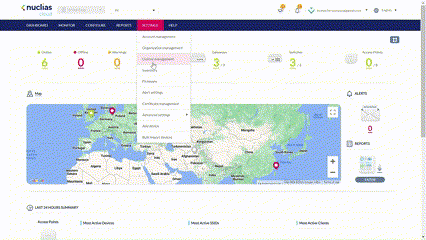
- Navigate to Settings > Advanced settings > SAML Configuration.
- Select Enable SAML SSO. The Entity ID (a globally unique name) and URL (Assertion Consumer Service URL) of the service provider (Nuclias) is displayed.
- Click Add to add a trusted identity provider (IdP) and enter the following information:
|
URL |
Enter the sign-on URL from the IdP. |
|
Issuer |
Enter the name or URI of the issuer. |
|
Certificate |
Upload a PEM certificate from the IdP. |
|
Logout URL |
When users log out, this URL is used for web redirection. |
|
X.509 Cert SHA1 Fingerprint |
The x509 certificate is used to establish trust communication with the IdP. |
|
Import IdP Metadata |
Besides the above method of manual IdP configuration, you can also use the import method. Enter an IdP information by importing an IdP metadata XML file downloaded from the IdP. |
- Click Save.
Creating SAML Roles
After establishing a connection with an external IdP, you can grant access permissions to this SAML user by assigning roles and access level.
- Navigate to Settings > Advanced settings > SAML Configuration.
- In the SAML Roles section, click Add to add a new SAML role.

- In the Add a SAML role window, enter the following information.
|
Name |
Enter a name for this user authenticated through SAML (1-64 characters). |
|
Access Privilege/Role |
Select the role to determine the access privilege level of this SAML user. |
|
Managed Site |
Select which Sites of the organization can be viewed by the user. |
- Click Save.
SMS Configuration
Short Message Service (SMS) containing one-time password can be sent from the system using Twilio SMS. The SMS authentication is used for user request for network access in Captive Portal configuration.
To configure SMS authentication service:
- Navigate to Settings > Advanced settings > SMS configuration.
- Click Add Twilio SMS settings.
- In the Add Twilio SMS settings window, enter the following:
|
Name |
A name that identifies this account setting (1-64 characters). |
|
Twilio Account SID |
Your Twilio account SID (1-64 characters). |
|
Twilio Auth Token |
The authentication token (1-128 characters). |
|
Twilio from Number |
The number registered with Twilio. |
|
Resend after (minutes)* |
Enter the resend interval in minutes (0-60 minutes). 0 means that it can be resent immediately. |
|
Maximum Resend (times) |
Maximum number of times that the one-time password can be resent. 0 means it can only be sent once (0-60). |
|
Maximum Request (times) |
Maximum number of times a new one-time password can be requested. 0 means it can make unlimited requests (0-60). |
|
Denial Period (minutes) |
The length of time that clients must wait before they can request a one-time password after the above resend and request limits are reached (0-1440 minutes). |
|
OTP Expires (minutes) |
The length of time that a one-time password is valid (5-30 minutes). |
|
Allowed Phone Prefix |
Country calling codes that are permitted to use SMS. Separate the codes with “,” (e.g. +81,+91,+886). “*” means all codes are permitted. |
|
Access Level |
Select level of accessibility for this account setting. |
- Click Save.
Syslog Server Configuration
You can configure the system to send syslog messages to an external syslog server.
To configure a syslog server:
- Navigate to Settings > Advanced settings > Syslog server configuration.
- Click Add.
- In the Add Syslog server settings window, enter the following:
|
Name |
A name that identifies this syslog setting. |
|
Syslog Server |
Enter the syslog server’s IP address or FQDN. |
|
Syslog Server Port |
The port used for the syslog service. |
|
Protocol |
The protocol to communicate with the syslog server. |
|
Select Site |
Select the site to allow for the syslog service. |
- Click Apply.