Floor Plans
Floor plans offer an easy way to visually represent the location of each device within the organization. Floor plans are managed per Site, and each Site can have multiple floor plans.
Adding a Floor Plan
You can create floor plans to have a visual overview of device placement.
Note : Floor plans are created for individual Sites within the organization.
- Navigate to Monitor > Floor Plans.
- Select a Site from the Site menu.
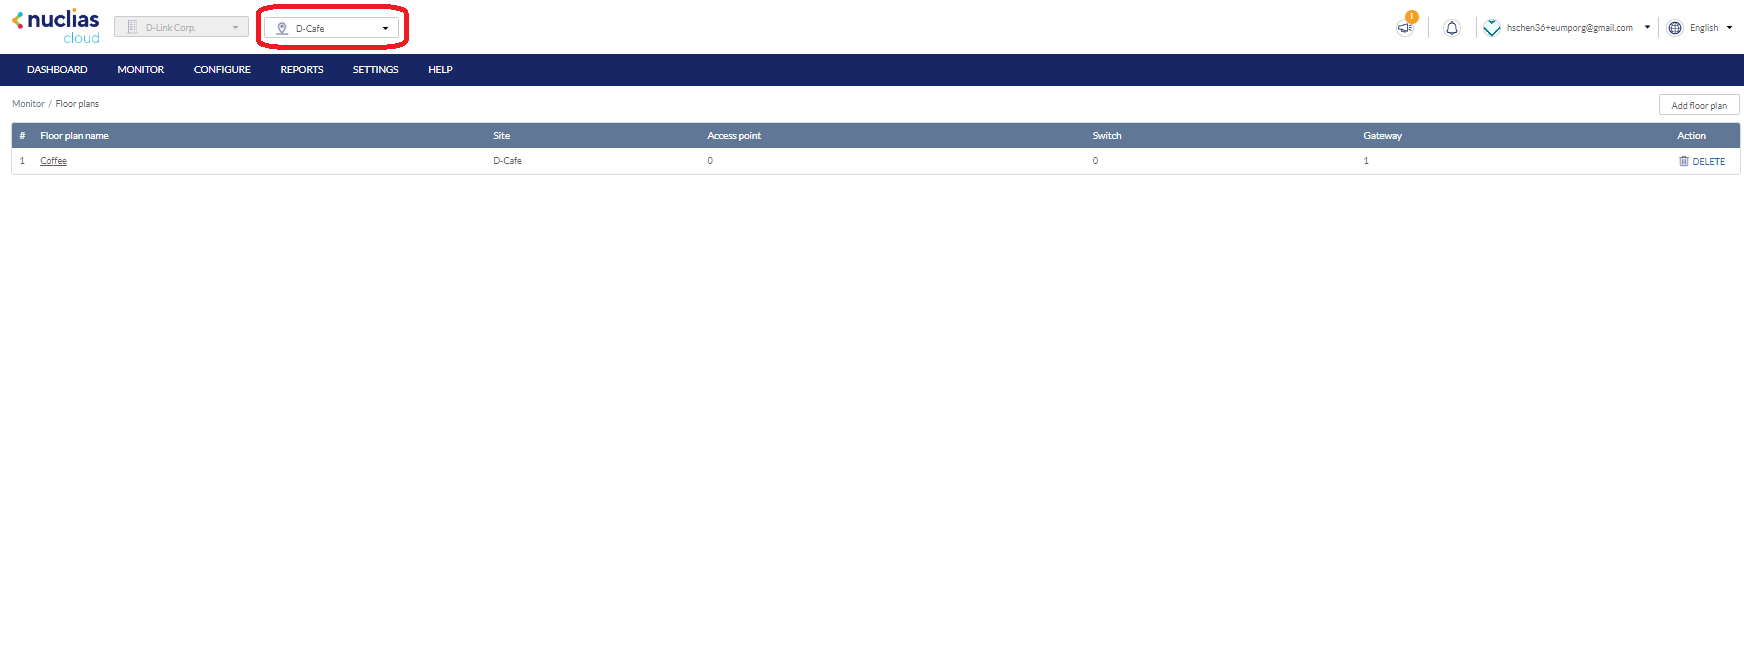
- From the floor plan list, click Add floor plan.

- Select the Site to associate this floor plan with.
- Click OK.
Editing Floor Plan
You can add device icons to floor plans for a visual overview of the device placement, edit the floor plan name, and upload a custom floor plan image.
Adding Devices to a Floor Plan
Devices can be dragged onto the floor plan to create a visual representation of the placement of the devices within the organization.
- Navigate to Monitor > Floor Plans.
- Select a Site from the Site menu.
- From the floor plan list click on the floor plan name.
- Click and drag a device from the Unplaced Devices list onto the floor plan to place it on the floor plan.
- Click Save.
Removing Devices from a Floor Plan
- Navigate to Monitor > Floor Plan.
- Select a Site from the Site menu.
- From the floor plan list, click on the floor plan name.
- Click the X icon next to the device in the device category list that you wish to remove.
Note: Devices removed from the floor plan will automatically be moved to the Unplaced Devices list.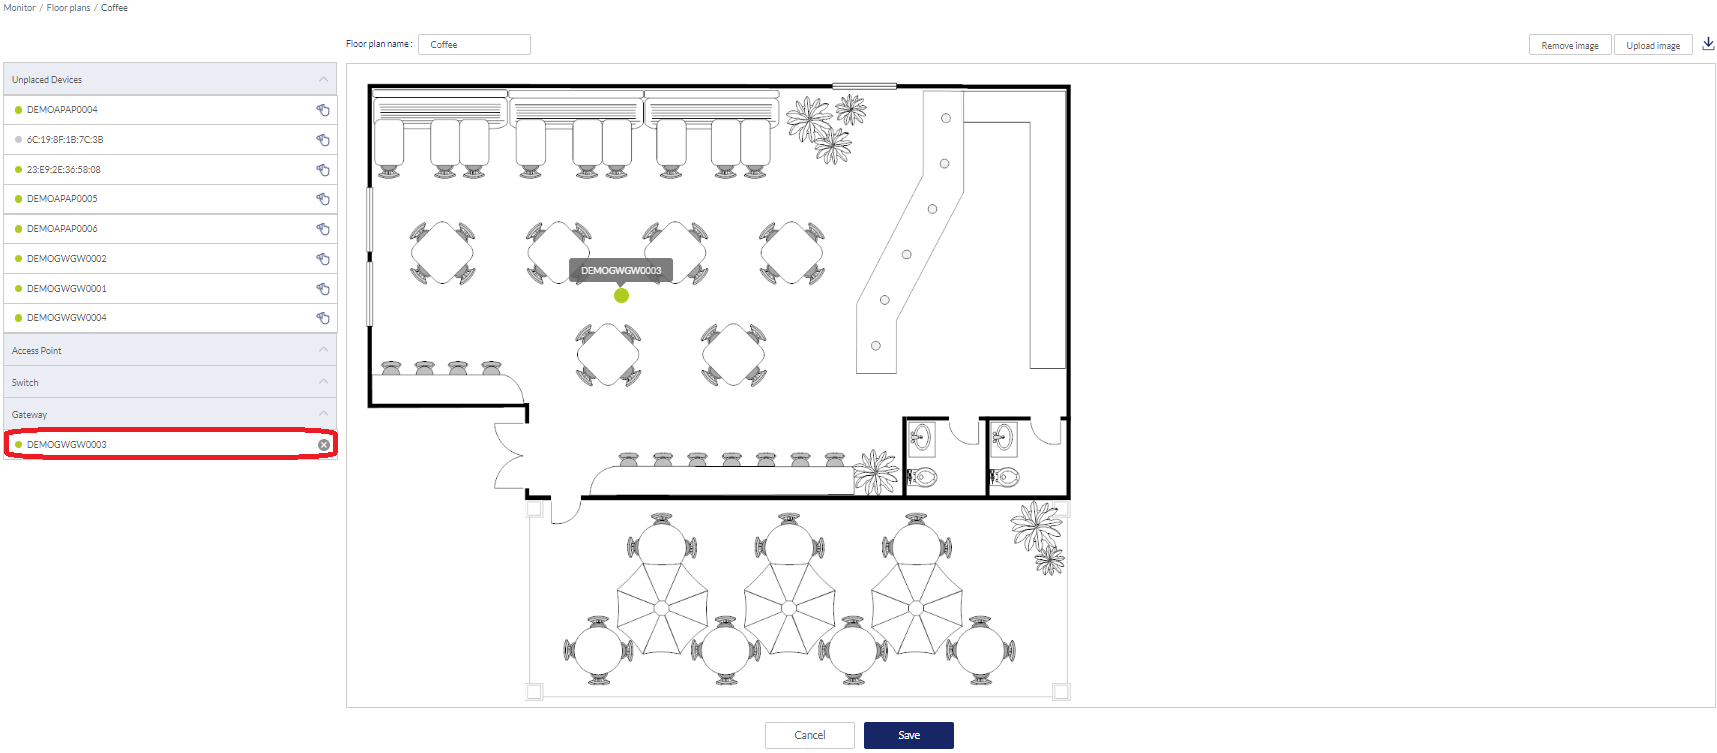
- Click Save.
Editing a Floor Plan Name
- Navigate to Monitor > Floor Plan.
- Select a Site from the Site menu.
Note: Selecting a Site will only show floor plans created for the selected Site. Select All to show all floor plans for all Sites. - From the floor plan list, click on the floor plan name.
- Click the floor plan name in the Floor Plan Name field.
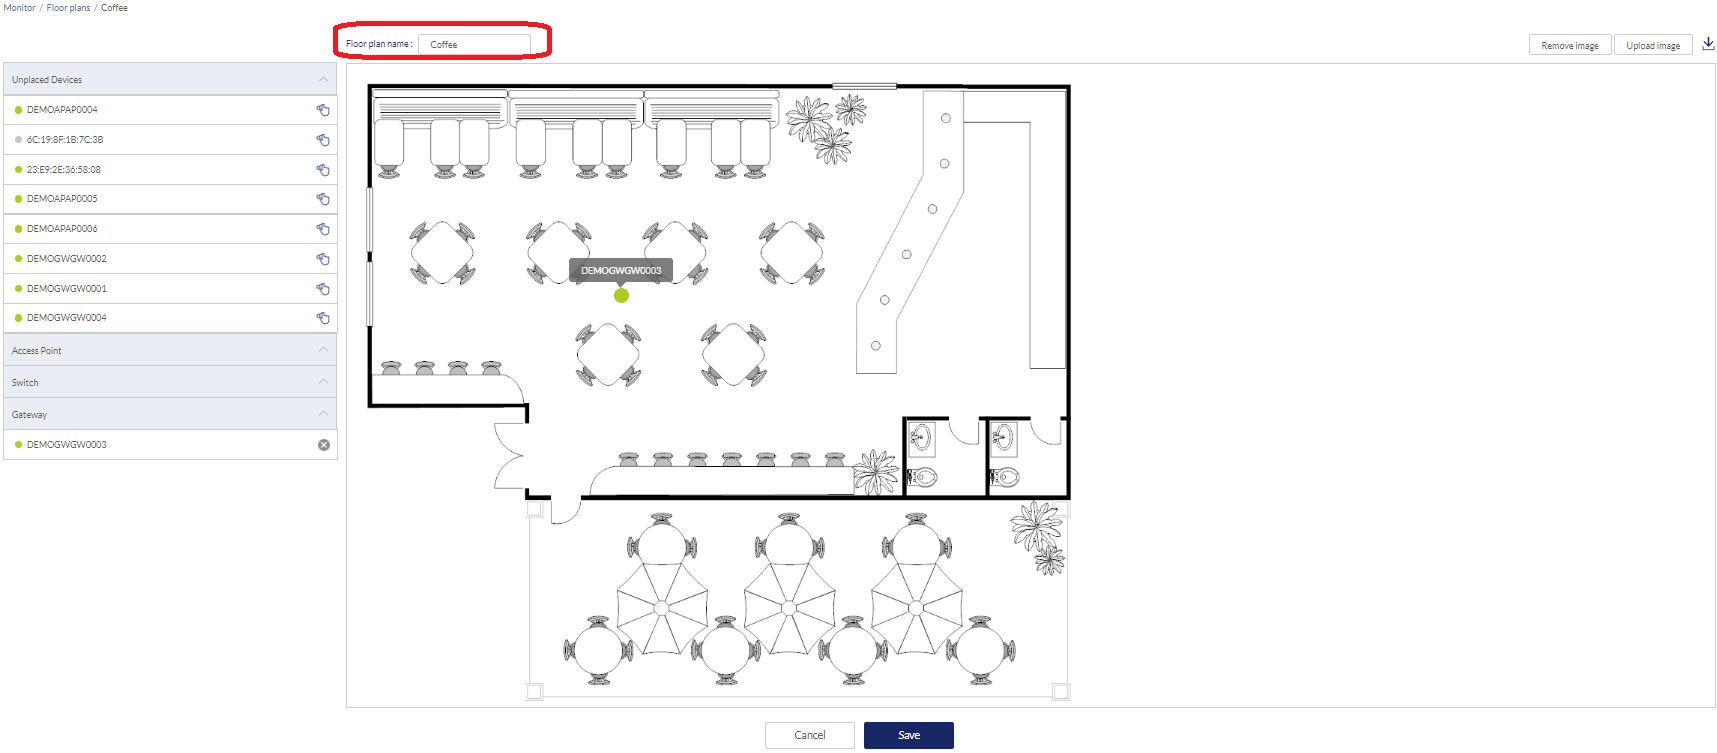
- Enter a new name and press Enter or click outside of the field
- Click Save.
Adding a Custom Floor Plan Image
- Navigate to Monitor > Floor Plans.
- Select a Site from the Site menu.
- From the floor plan list, click on the floor plan name.
- On the floor plan page, click Upload image.
- In the Upload Image window click Browse and navigate to the floor plan image you want to use. You may upload PNG, GIF, BMP, TIFF, JPEG, JPG files up to 1MB.
- Click Upload.
- Click Save.
Removing a Custom Floor Plan Image
- Navigate to Monitor > Floor Plans.
- Select a Site from the Site menu.
- From the floor plan list, click on the floor plan name.
- On the floor plan page, click Remove image.
- When prompted to confirm, click Delete.
Note: Deleting a custom image will restore the default floor plan image. - Click Save.
Deleting a Floor Plan
- Navigate to Monitor > Floor Plans.
- Select a Site from the Site menu.
- From the floor plan list, click the Delete icon under the Actions column of the floor plan you wish to delete.

- When prompted to confirm, click Yes.