Splash Pages
From the Splash Page Editor window, you can configure and customize splash pages to use with the SSID or gateway. This can be configured to have users click through or enter credentials for a variety of purposes such as Captive Portal authentication page and OpenVPN profile download page or to display warning messages for Web Content Filtering. You can either customize any of the default splash pages or create your own unique splash pages.
Creating a Custom Splash Page
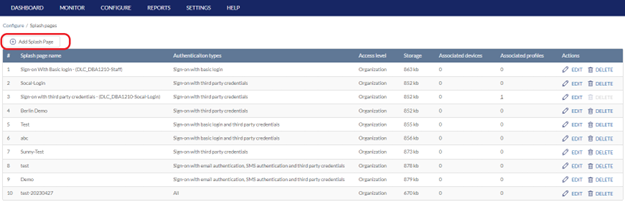
- Navigate to Configure > Splash Pages.
- Click Add Splash Page at the top left.
- In the Add a Splash Page window, enter the required information:
|
Splash Name |
Enter a name for the splash page. |
| Style | Select the Template option to save it as a template. |
| Access Level | Select the level of access: Organization, Site tag, or Site to make the template available under the defined level. |
| Clone from | Select a template to use with the design from available templates under the designated access level. |
| Click Next to continue configuring the items on the Splash Page. | |
|
Preview and Edit in Use Case |
Select the use case of the splash page. The following are available: Click-through: Only requires users to click through the splash page without entering credentials. Sign-on with basic login page: Requires users to log in using local user account credentials. Sign-on with third party credentials: Requires users to log in using third-party account credentials. Sign-on with basic login and third party credentials: Requires users to log in using local user account or third-party account credentials. Sign-on with email authentication, SMS authentication and third party credentials: Requires users to log in using their emails, verification code through SMS, or third-party account credentials. Sign-on with SMS authentication: Requires users to log in using verification code through SMS. Sign-on OmniSSL VPN: Used for signing to download OpenVPN clients and connection profile. Session limit warning page: Used to display warning of maximum session reached. Web content filter warning page: Used to display a warning about restricted web content. |
|
Login |
Select the Login tab at the top to edit the login page for signing on. You can click on an element to modify the background image or the displayed words with the desired fonts and colors. |
| Messages | Select the Messages tab to edit message pages for different circumstances depending on the use case selected. You can click on an element to modify the background image or the displayed words with the desired fonts and colors. |
| Terms | Click this tab at the top to modify the content of Terms. |
You can then use the Preview function at the top right to preview the page design under different devices. Just click Edit to switch back to the Edit mode.
- Click Save.
Editing a Splash Page
- Navigate to Configure > Splash Pages.
- In the Actions column, click Edit for the splash page you wish to edit.
- Click the respective splash page section tab and edit the following information:
|
Header |
Edit the header section of the splash page. |
|
Footer |
Edit the footer section of the splash page. |
|
Login |
Edit the login page content. |
|
Progress |
Edit the processing page. This content will show while connecting to the SSID. |
|
Landing |
Edit the landing page content. This content will show when users have successfully connected to the SSID. |
|
Error |
Edit the error page content. This content will show when users have failed to connect to the SSID. |
|
Managed Files |
Upload or remove files from the splash page. Example files include logos, icons, and images. |
|
Terms |
Edit the Terms of Use content. |
- Click Save.
Deleting a Custom Splash Page
- Navigate to Configure > Splash Pages.
- From the list, click Delete under the Actions column for the splash page you wish to delete.
- When prompted to confirm, click Yes.